|
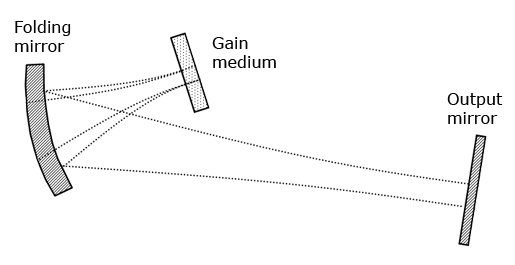
In this tutorial we consider a simple laser resonator design containing
only three optical elements (so called "V-shaped cavity") -
gain medium, folding and output mirrors.
Creation a new schema
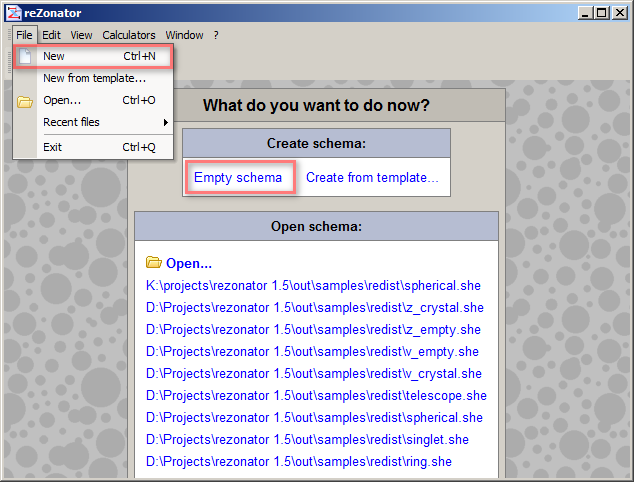
Run rezonator via start menu shortcut or desktop shortcut.
First window you see after application started is "welcome window".
Optical system be investigated is called "schema" in rezonator's terms.
Create a new schema via File -> New menu command or
via Empty schema command in central area of the window.
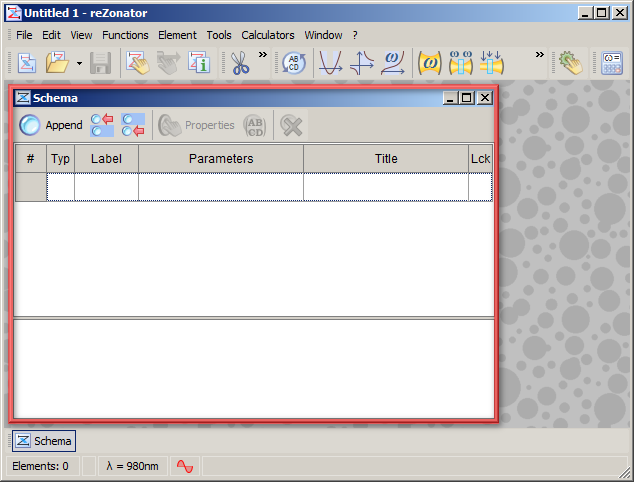
Schema window
Additional window opened is called "schema window".
It contains "elements list" - table of optical elements
(or just "elements" in the sequel) composing the schema.
Elements list is empty by default as we selected creation of empty schema.
Also bunch of toolbars and menu commands for manipulating and analyzing
the schema now available.
Adding an element
Leaving all schema properties in default for a while let's construct our
system by adding some elements.
Add new element via Append button on the schema
window toolbar or with help of menu command Element -> Append...
or just pressing Ctrl + Ins keyboard shortcut.
Dialog window opened is called "Elements catalog".
It contains all supported elements indicated by its icon and title.
All elements separated into some categories. For highlighted element a small outline is
being shown representing a meaning of element parameters.
Select needed element and press OK button.
Let's start with "Plate of matter" element.
It is generalized normal edged plane-parallel segment of medium in the air.
In our schema it will be present an active crystal of laser resonator.

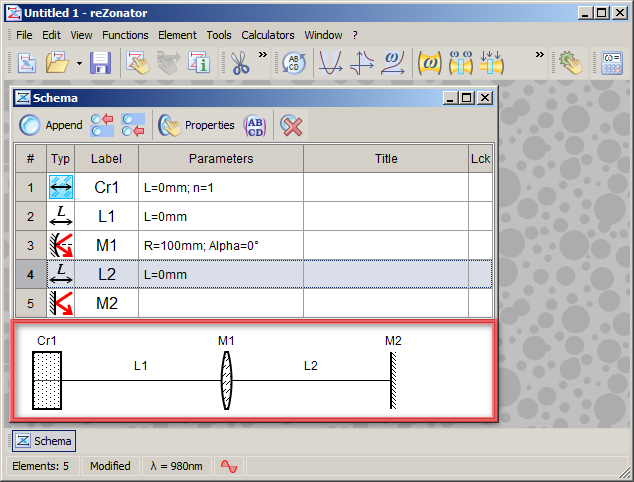
Elements
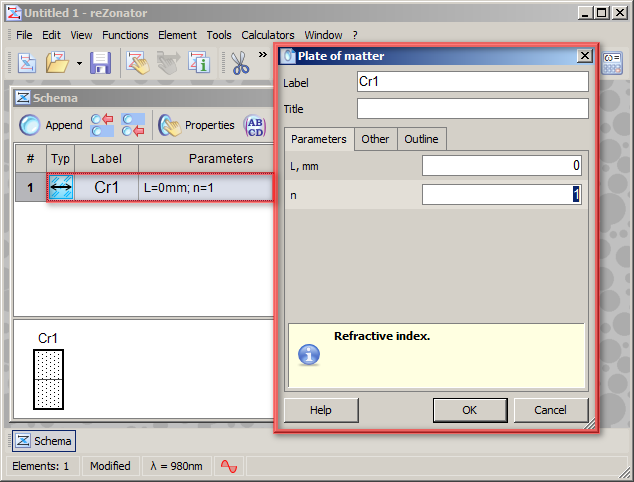
New element has been added to the elements list.
You can notice that rezonator have generated label for new element - Cr1.
Cr - is default label for crystals, M - for mirrors and so on.
Default label is followed by a number showing a count of elements of the same type.
In some cases depending of global rezonator's settings you can see
an "Element properties" dialog immediately after element has been created.
For a while just close this dialog with OK or Cancel button.
We will review it later.
Filling up the schema
In the same manner as described above add more elements to the schema.
For the chosen resonator type
in addition to crystal we have to append subsequently:
Empty space
Spherical mirror
One more empty space
Flat mirror
Layout
Picture at the bottom of schema window schematically represents all elements in
the schema. It is called "layout". All schema foldings are neglected on
the layout, so it gives a linearized representation of the system.
Important function of the layout is to show how a beam travels the schema.
It is supposed in all calculations that beam runs from the left to the right,
from first to last element of schema.
Do not forget!
If studied schema is standing wave resonator (as considered one)
then the path from first to last element is only half of full resonator round trip.
It is supposed in this case that first and last elements are endings and they
must return beam back to the system. Ending elements are taken into account only
once per round trip, while remaining elements twice -
for forward trip and for backward trip.
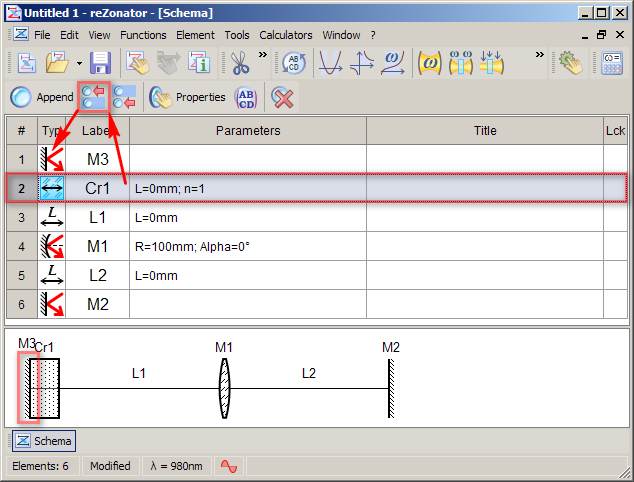
Finalizing the design
So we can notice now our schema is not quite correct.
The crystal (Cr1) stands as ending element and will be accounted only once per round trip.
But really only one of its faces is ending while entire body must be considered twice.
To fix this issue we have to insert a true ending element - flat mirror -
before the crystal. Click the crystal to highlight it and use menu command
Element -> Create before selection... to pop up
"Elements catalog" dialog.
Download
Download tutorial file. Click on this link with
right mouse button and select context menu command "Save target as".
Learn more
See the next tutorial
to learn about schema editing, saving, properties of schema and more subjects.
| 