|
In this tutorial we continue working on the schema created during
previous tutorial.
Kind of the system
First of all let's ensure that the schema has correct type.
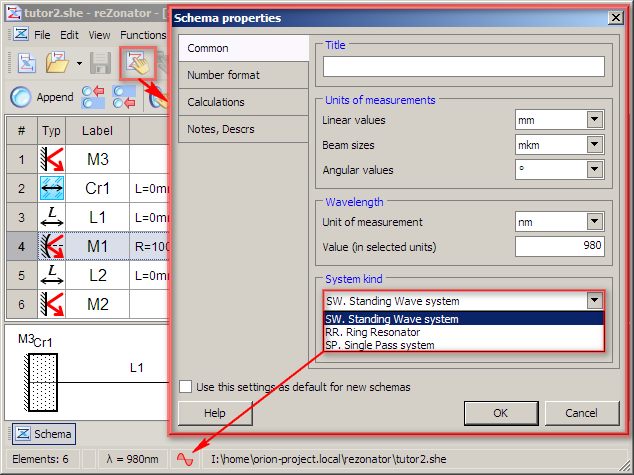
Pop-up "Schema properties" dialog via
File -> Properties... menu command,
or Schema properties toolbar button,
or F11 keyboard shortcut.
All global properties of schema can be altered trough this dialog.
But in this step we only interested in the drop-down list "System kind" at the bottom of "Common" page.
Currently rezonator supports three types of systems: standing wave
resonator (SW), running wave (ring) resonator (RR) and single pass system (SP).
The last one is not resonator but just regular optical system (such as
beam expander, pump focusing system and so on).
Schema kind should be set to SW for this tutorial.
Special icon in the status bar is displayed for each kind of schema.
Sine-like icon means SW-system, and its red color means the resonator is not
stable now so it can not provide laser operation. Stability problem will be
covered in next tutorials.
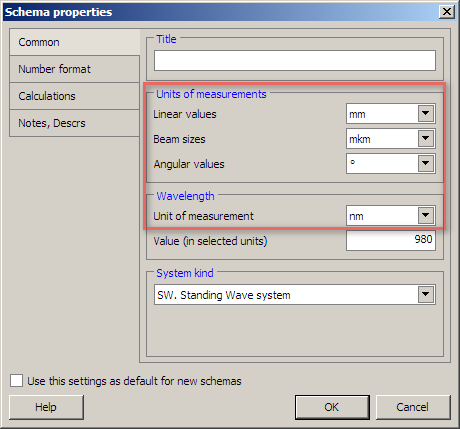
Units of measurement
In most cases it is not too convenient to use same units for measurement
of very differently sized values. It is not too intuitive to user
to set a wavelength in meters or a distance between elements in angstroms,
for example.
To solve this issue rezonator offers an option
to set different units of measurements for distinct kinds of values.
"Linear values" are ranges between elements
and sizes of elements (length of a crystals and so on).
Let's set it to millimeters for this tutorial.
"Beam sizes" are radii of any beams.
As beams injecting into schema by user (input beams for single pass systems)
so as beams calculated by rezonator's functions.
Set it to micrometers for now.
"Angular values" are units to measure the angle of beams divergence
and any other angles. Set it to degrees.
"Wavelength" are units to set processing wavelength in a system.
Nanometers are suitable for now.
Wavelength
It is possible to set wavelength value via "Schema properties" dialog shown above.
But there is special "Wavelength" dialog available allowing to easy set
of wavelength value with no distraction to another schema properties.
It is opened by File -> Change wavelength... menu command,
or F10 keyboard shortcut,
or just by double-clicking wavelength value in the status bar.
Let's set wavelength to 1030 nm for this tutorial.

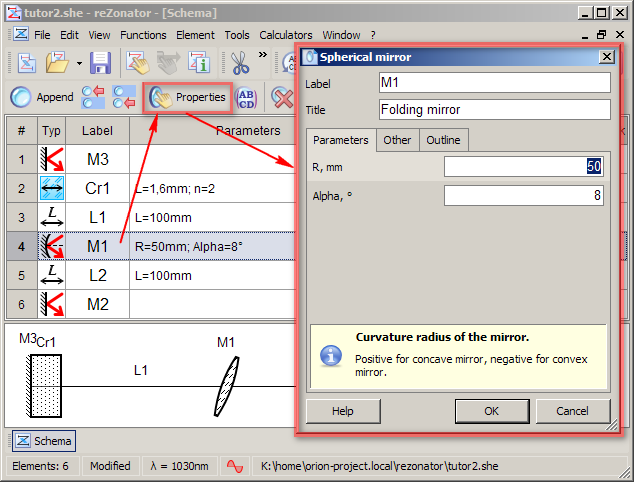
Element properties
All general schema properties are set now, so it is time to set up some elements.
"Element properties" dialog is opened through
Element -> properties... menu command, or
Enter hotkey, or by double-clicking selected
element in the elements list.
All parameters specific to the element are listed on the "Parameters" page.
There is also collection of common parameters on the "Other" page,
but these are not considered in this tutorial.
Each parameter is characterized by its name, unit of measurements and
brief description showing at bottom of page when parameter is highlighted.
In addition the "Outline" page contains a schematic of element
were all parameters are graphically marked.
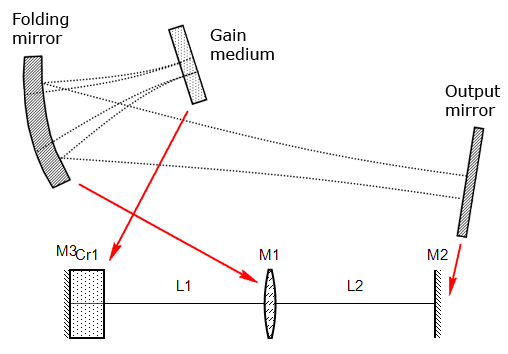
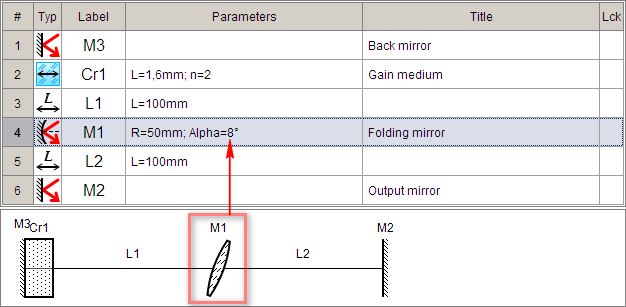
Setting up elements
Suppose that crystal (Cr1) and folding mirror (M1) are our "hardware" so
their parameters are known. Let's set these as on image below.
Incident angle of folding mirror and ranges L1 and L2 are subjects of investigation
so their parameters are set to unconditioned values for now.
Notice that the imaging of spherical mirror on the layout altered,
indicating that incident angle is set to some nonzero value.
Now our system is fully constructed and schema file should be saved.
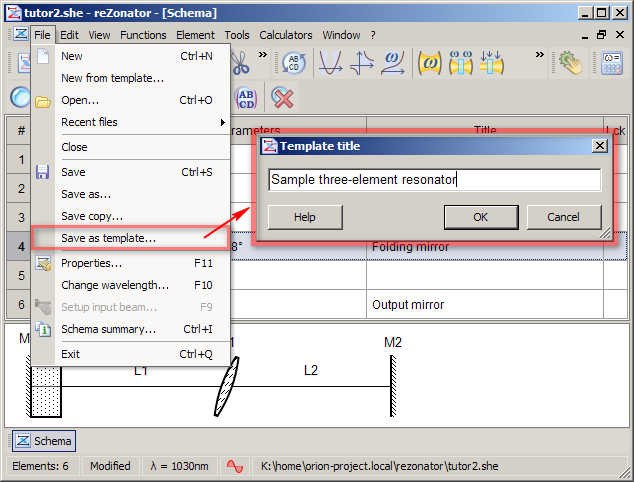
Saving a template
It is often needed to calculate the same system but with different element
parameters values or with various wavelengths or something like this. A handy option
to do it simpler is to open previously designed schema file and copy it by
"Save as" command.
A convenient alternative is called "Templates". Once properly
constructed system can be saved as skeleton of future systems with menu command
File -> Save as template.... You only required
to input a suitable title for this skeleton (template). Template holds all
schema properties values, all created elements and its parameters values.
Save your schema as template with name you like.
How to use templates will be considered in the next tutorial.
Download
Download tutorial file. Click on this link with
right mouse button and select context menu command "Save target as".
| 